I absolutely love my acrylic markers—they’re a total game changer! 🎨✨ There’s no fuss with getting out my brushes, preparing my work area or bothering with any clean up. I grab my box of markers and have a seat where my heart desires and I can get started right away. They work on almost any surface: paper, metal, glass, plastic, wood, ceramic, styrofoam, rubber—you name it! I even tried them on fabric (though there was a bit of bleeding).
I use them all the time for labeling my kids’ lunch boxes, water bottles, Tupperware, and school supplies—and, of course, for my artwork. 🎨🖌️
Choosing the Right Paper for Acrylic Markers
While they work well on paper, the type of paper matters. Some papers can be too absorbent, causing them to drink up the paint quickly and wear down markers faster. If the paper gets too wet or is overworked, it can also become clumpy.
The best choices for acrylic markers:
✔ Marker paper – Smooth, less absorbent, and designed to handle ink well.
✔ Yupo paper – Works beautifully, allowing for smooth, vibrant applications.
✔ Photo paper (film?) – Also gives great results with a glossy, slick surface.
Papers to avoid:
❌ Sketching paper – My last choice, as it’s often too textured and absorbs too much paint.
Acrylic Marker Tips & Best Practices
Acrylic markers come in a variety of tips: fine, medium, large, chiseled, and brush tips. Quality varies by brand, and I can confidently say that Posca acrylic markers are my go-to. Their color application is immediate, while some other brands require a frustrating amount of priming before the paint flows consistently. This can waste paint much faster.
✔ Shake well before use—most markers contain a mixing ball inside, like nail polish, to blend the paint.
✔ First-time use? Press the nib once with your thumb to release air pressure.
✔ Activate the flow: After shaking for 20 seconds, press the nib on your surface several times until the paint starts to absorb and flow.
✔ Repeat this process each time you use the marker—otherwise, the nib dries out.
What if the nib gets clogged or damaged?
No worries! If the nib dries out or becomes blocked, you can remove it and rinse it under warm water. Just make sure it’s completely dry before using it again—you don’t want to mix water with the paint! Some markers even come with spare nibs for easy replacement.
Acrylic markers are versatile, vibrant, and fun to use—whether for art, customization, or everyday labeling. If you haven’t tried them yet, you’re missing out! 🎨✨
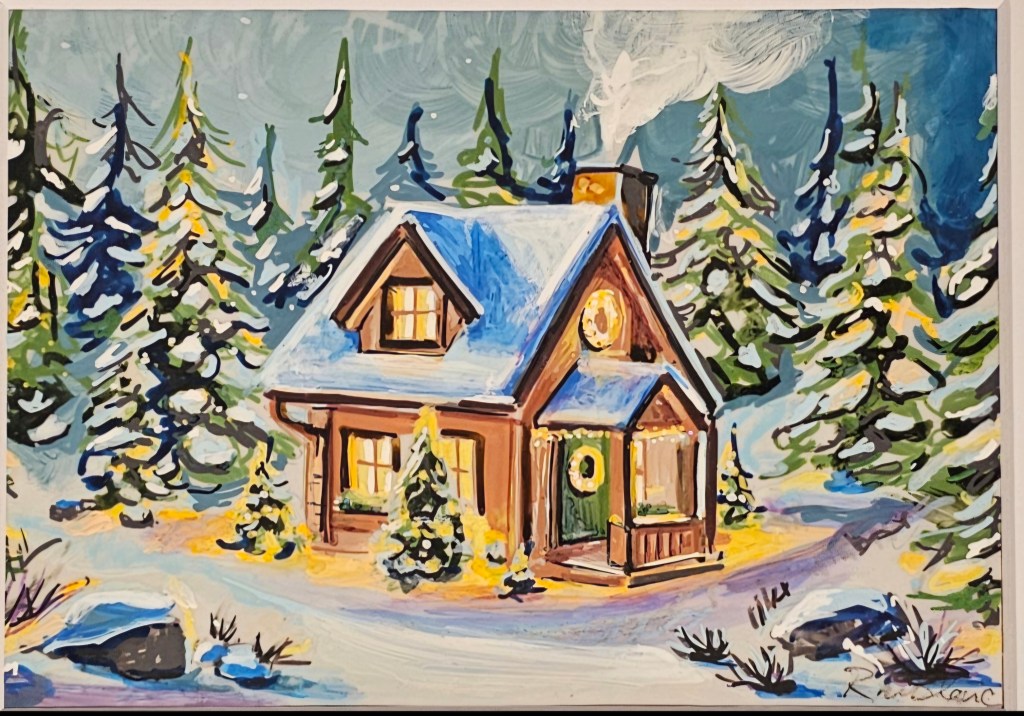
Éclat Hivernal (2024 Regional Christmas Card Category Winner)
This winter scene, titled Éclat Hivernal, was the regional winner in the 2024 Christmas card category. Created on 5 x 7″ Yupo paper using generic acrylic markers, this piece was all about layering and light.
Yupo’s smooth surface made the first layer a bit slippery, but once that initial base was down, it gave just the right amount of grip for additional detail and depth. At the final stage, I introduced a pale lavender alcohol ink marker to shade the snow—something I couldn’t have achieved with an opaque marker. That subtle, translucent tint gave the snow a soft, atmospheric quality, helping the warmth of the cabin glow even more against the cool landscape.
It’s a cozy, glowing tribute to winter—inviting, peaceful, and lit from within.
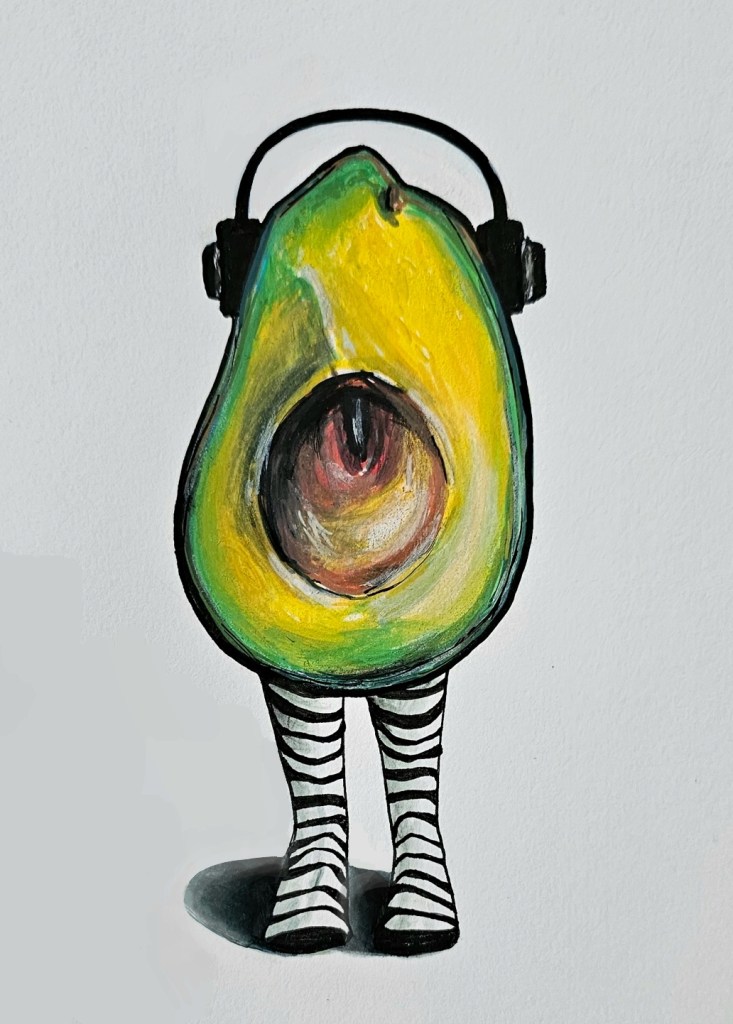
Avocado Groove
This quirky little piece was done using acrylic markers on mixed media paper, blending playful imagery with simple, bold shapes. I kept the palette vibrant, layering the acrylics slowly to build depth and contrast—especially around the pit and outer skin.
For the subtle shadow under the legs, I used a very pale grey alcohol ink marker. It gave just the right hint of grounding without overpowering the image—something that would have been harder to achieve with an opaque marker.
The striped legs and headphones add a touch of personality without taking things too seriously. It was one of those lighthearted pieces that came together on instinct, and I let the process stay loose and fun throughout.
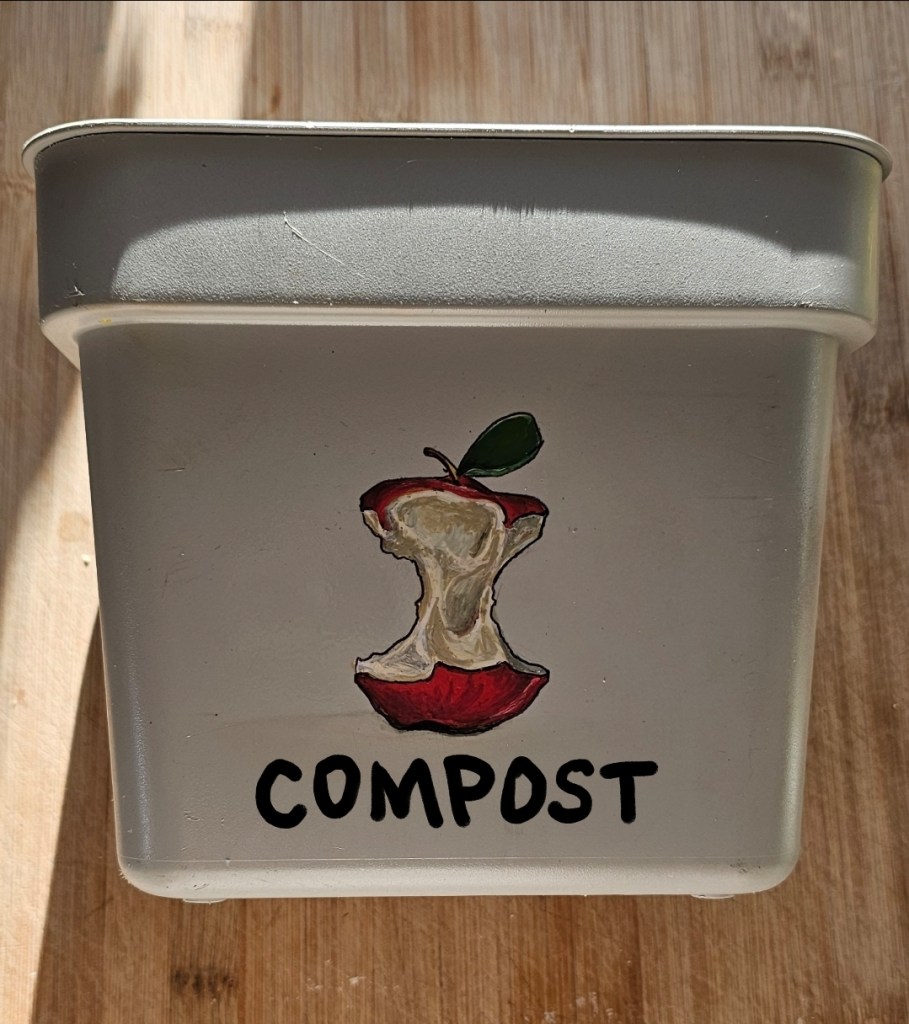
Here’s an example of using the paint markers on a plastic surface. I love transforming everyday house items into something a little more special. Since I’ll be handling the bin often and washing it when it gets dirty, I made sure to seal the design with a clear spray. Here, I used high gloss spray from Rustoleum. I have about 4 coats of spray on it. It’s been over 2 years since I’ve made this, and it’s still in perfect condition!
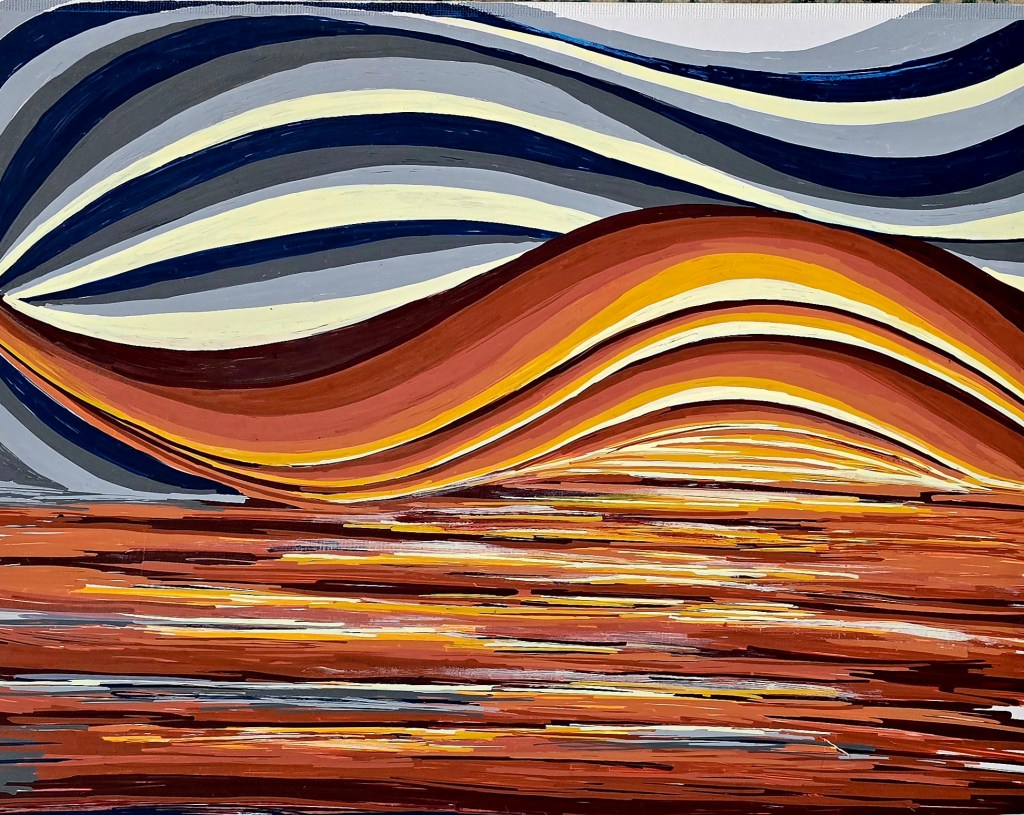
“Skywoven”
This piece was created using acrylic markers on the reverse side of a thin Dollarama canvas panel—a surprisingly effective choice due to its slightly glossy surface, which allowed the markers to glide smoothly and blend beautifully.
Layer by layer, the lines evolved into a rhythm that hints at landscape, light, and motion all at once. The warm tones in the lower half mimic reflections or terrain, while the sweeping curves above suggest a stylized sky in movement.
There was no plan going in—just a color palette and a need to follow the flow of each stroke. The surface took the pigment effortlessly, making this one of those pieces where the medium seemed to cooperate completely.
This was a spontaneous exploration of form through repetition—a meditative, abstract wave of line, light, and warmth.

Leave a comment